
Garage doors are essential components of our homes, providing convenience and security for our vehicles and other belongings. One crucial aspect of garage doors is their cables, which play a vital role in the door’s operation. Over time, wear and tear can lead to frayed or damaged cables, posing safety risks and potentially causing the garage door to malfunction. Understanding the importance of these cables and recognizing the signs that they need replacement is essential for every homeowner.
Replacing garage door cables may seem like a daunting task, but with the right knowledge and tools, it can be a manageable DIY project. In this article, we will explore the common indications that your garage door cables need attention, the steps involved in safely replacing them, and tips for maintenance to extend their lifespan. Whether you’re a seasoned handyman or a first-time DIYer, this guide will help you ensure your garage door operates smoothly and safely.
Signs Your Garage Door Cables Need Replacement
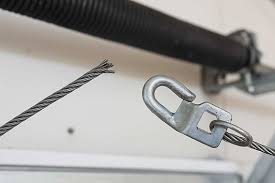
One of the primary indicators that your garage door cables require replacement is visible fraying or wear. Inspect your cables regularly for signs of damage, such as strands that are frayed, broken, or rusted. Another sign is if your garage door starts to operate unevenly or makes unusual noises, which could indicate that the cables are losing their effectiveness. Additionally, if the door fails to open or close properly, it may be due to worn cables that can’t handle the door’s weight, making it crucial to address these issues promptly. Regular maintenance can help in preventing such problems, but ultimately, recognizing when it’s time for a garage door cables replacement is key to ensuring safety and functionality.
Steps to Replace Garage Door Cables Safely
Before undertaking the replacement process, it’s essential to gather all necessary tools, including safety gloves, pliers, and a step ladder. Begin by disconnecting the garage door opener to prevent any unintended activation. Next, secure the door in a closed position and use the appropriate method to relieve tension on the cables, often achieved by disengaging the springs. Carefully remove the old cables and replace them with the new ones, ensuring that they are properly threaded and secured. Finally, test the garage door operation multiple times to verify that everything functions smoothly. Following these steps can instill confidence in your DIY capabilities while ensuring your garage door remains safe and operational.
In conclusion, replacing garage door cables is a crucial maintenance task that enhances both the safety and functionality of your garage door system. By staying vigilant and promptly addressing signs of wear and damage, you can prevent more severe issues down the line. Following the outlined steps for replacement will not only empower you as a DIY enthusiast but also provide peace of mind knowing that your garage door operates smoothly and securely. Remember to incorporate regular inspections and preventive maintenance into your routine to prolong the life of your garage door cables and avoid potential malfunctions in the future. With the right approach and care, you can ensure your garage remains a reliable and safe space for your belongings.